User Manual
Loe ka meie kasutusjuhendit eesti keeles.
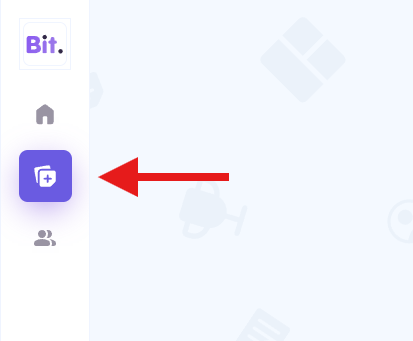
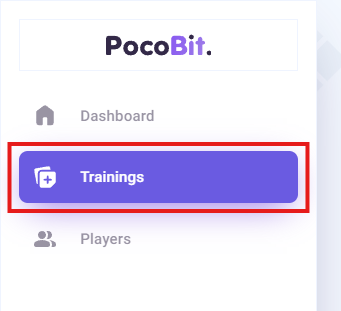
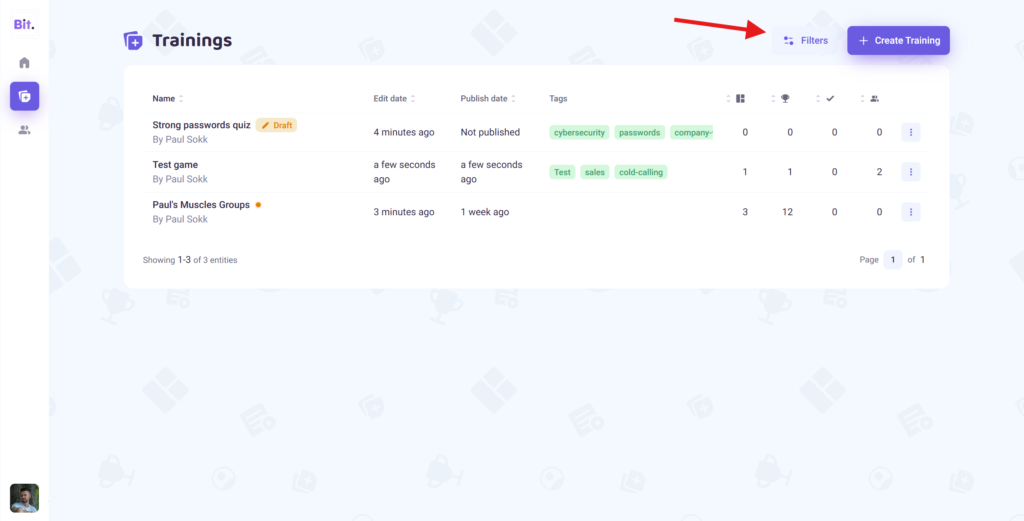
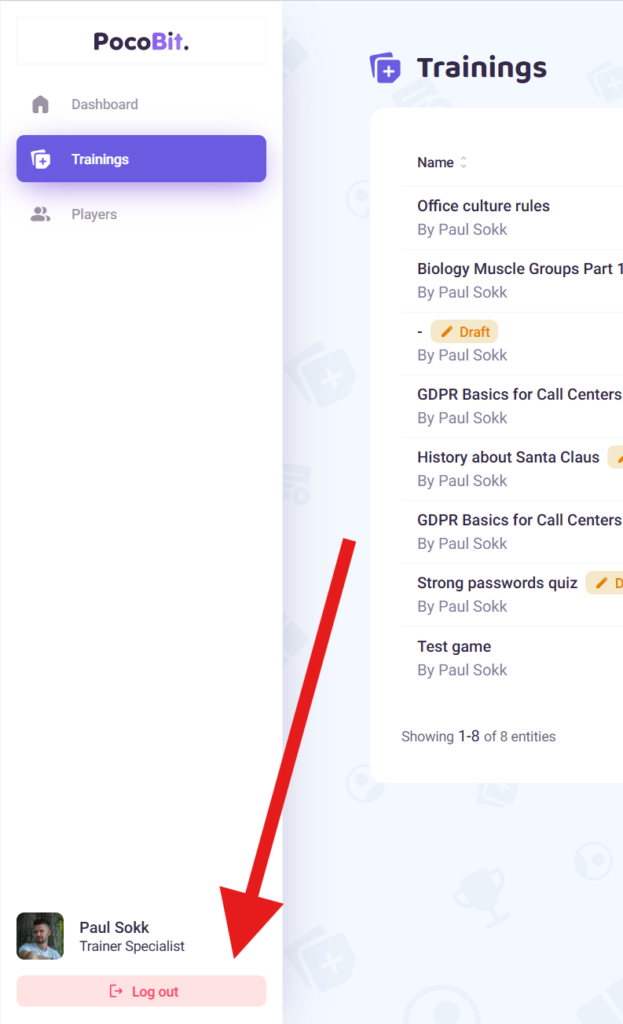
You can manage your created games by navigating to the Trainings page with the navigation menu on the left side of the screen:
In the Trainings page you can see all of your created games in a well organized table. Clicking on any of the trainings opens that training for further editing.
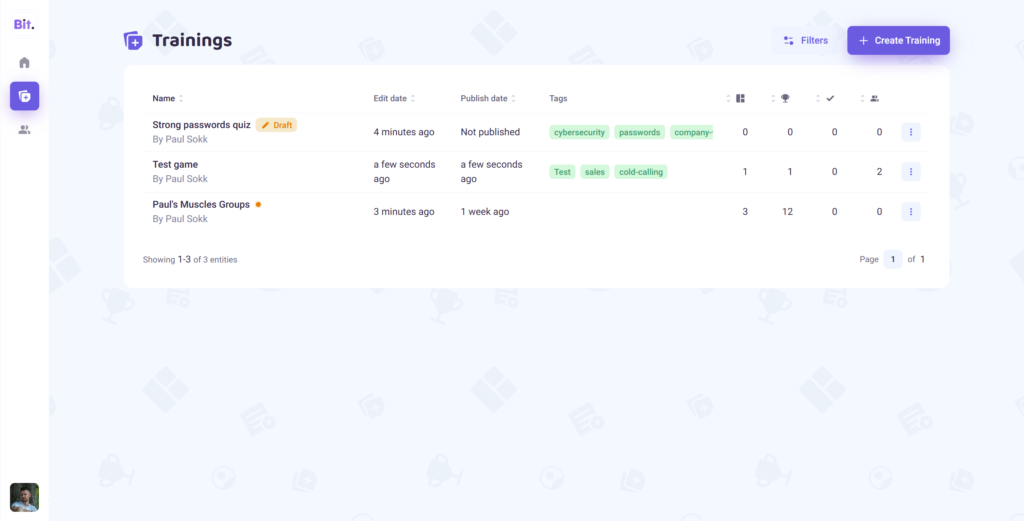
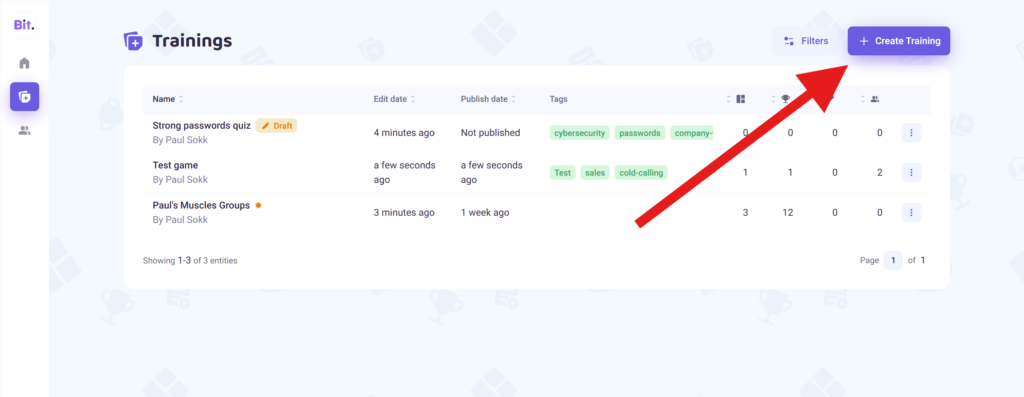
To create a brand new game, press the “+ Create training” button and you will be redirected to the game creation view.

For further instructions how to create a new game see the steps here: Creating new games
To edit an existing training just click on the training that you wish to edit to open it in more detail and start editing.

The editing of published games is limited! For more details see: Editing published games.
For further instructions how to edit a game see the steps here: Creating & editing games
There are quick access buttons for every training which allow you to share, duplicate and delete a game straight from here.
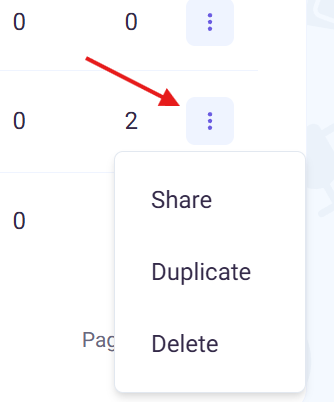
You need to always publish a training before it can be shared. Unpublished changes are not visible to the player.
When you duplicate a training, the new one is marked with a “(copy)” behind it’s name. The new game is now in a draft state to give you full access to edit all parts of the game before publishing it again.
Deleting a game is final and it can not be reverted. You lose all of the training content and players’ completion data about this game once you delete the game.
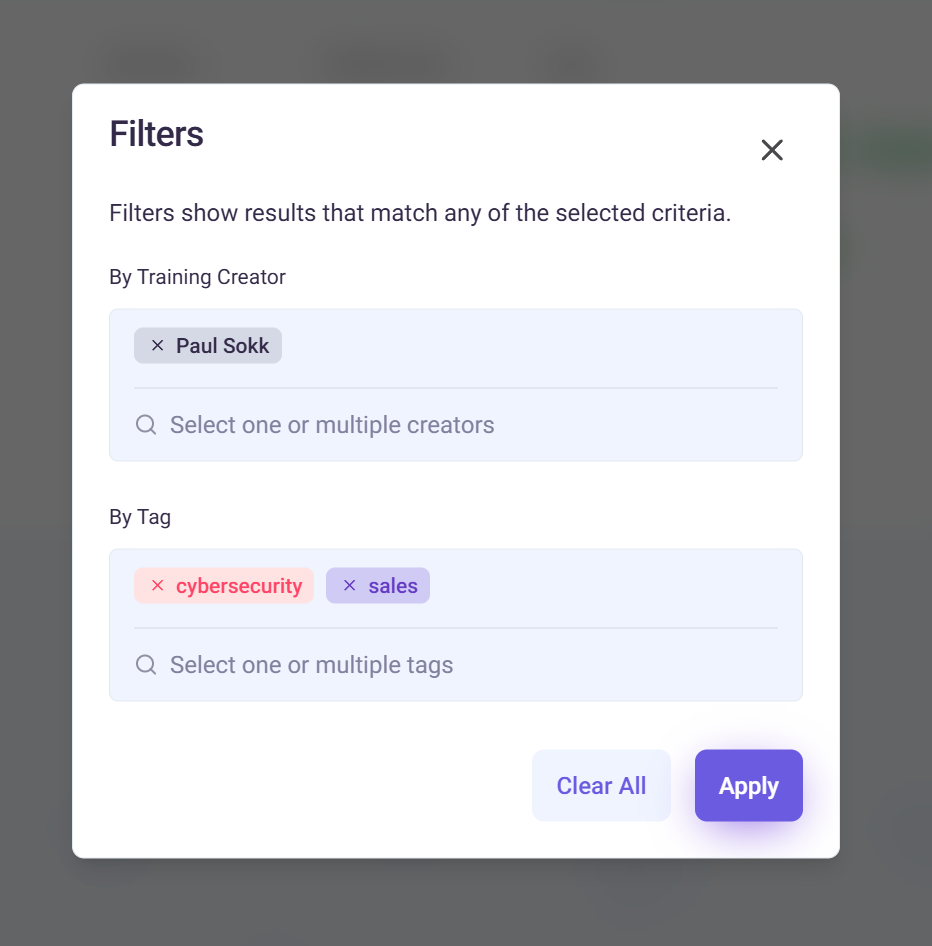
You are able to filter which games are shown at the trainings table by applying filters. You can filter by tags and by game creators. Applying multiple filters will show all games that match at least one of the applied filters.
Every game is either in a draft, published or published, but has unpublished changes state. Those states are marked accordingly:
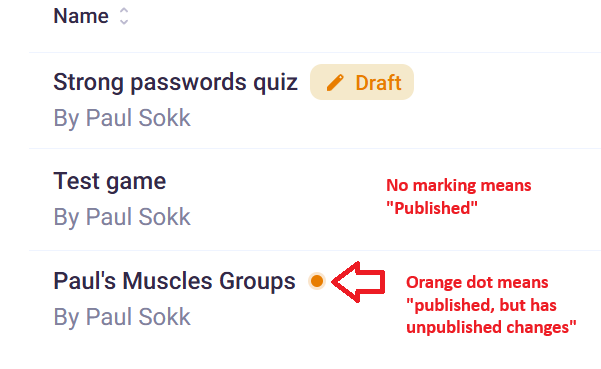
Games that are in draft states can’t be shared with players until they are published.
Editing published games is limited! See Editing published games for more details.
To start creating a new game press the “+ Create training” in the trainings view.
When you first start creating a new training, the AI training creation view opens.
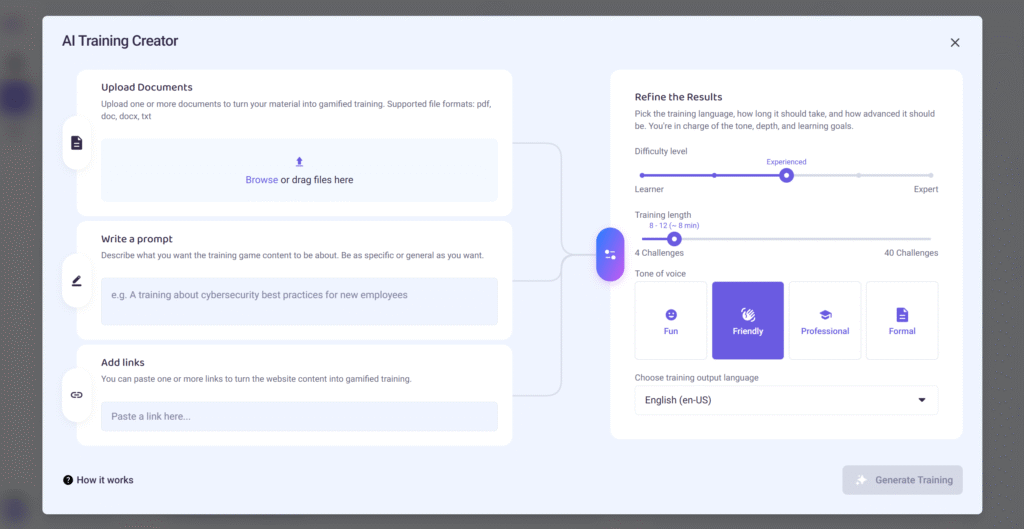
There are three ways to generate a new training. You may use just one or combine multiple ways:
- Upload your training material or handbook (pdf, txt, or Word document);
- Write a description (prompt) of what you want the training game to be about;
- Add link(s) to public websites that have the content for the training topic.
After that you can choose the variables for the training game:
- Choose the desired training game difficulty with the slider;
- Choose the desired training game length with the slider
- Choose the tone of the game (“Fun” will make more funky jokes, and “Formal” will give more serious examples);
- Choose the game language. (You may let PocoBit generate a training game in a completely different language than the input materials you originally gave);
- Press “Generate Training”.
In a few seconds, you should see challenges being generated in the list at the bottom of the page.
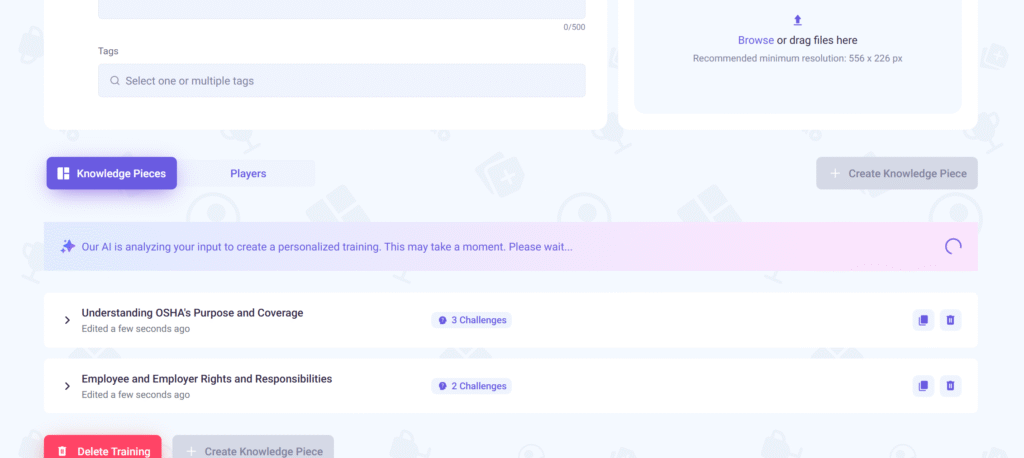
While you see the text “Our AI is analyzing your document to create personalized training. This may take a moment. Please wait…” the game is still being generated. Usually, it takes no more than 2 minutes.
If you need to leave before the training generation is complete, feel free to do so. The training generation will not break if you close or refresh the page.
You can edit the challenges and knowledge pieces that were generated or add more manually. See Adding challenges and Editing challenges
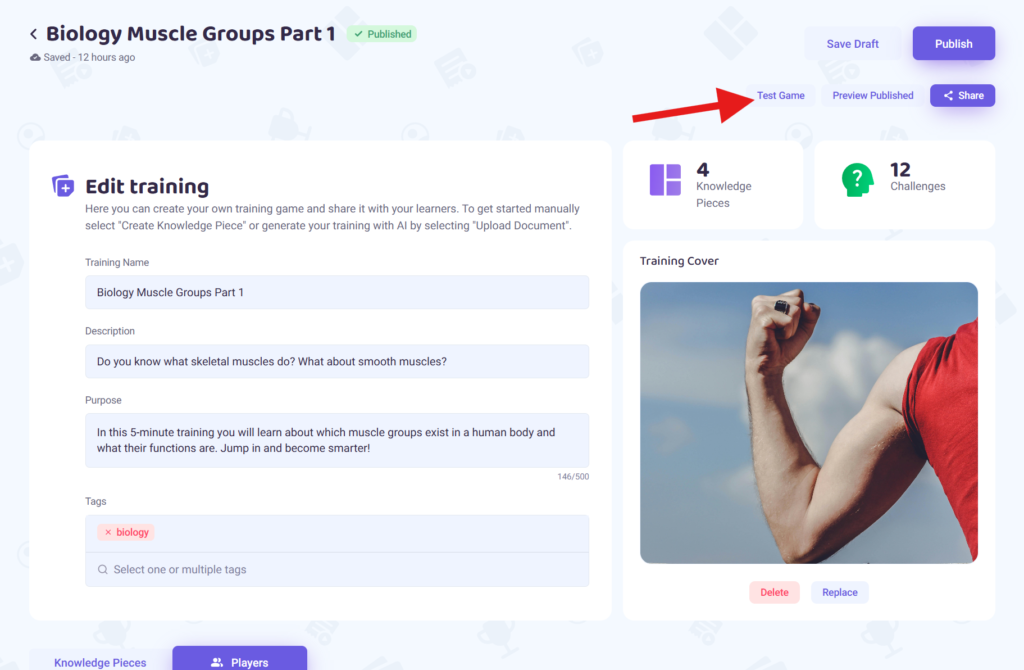
When creating a brand new game you can fill some information which will help you identify the game better later, and also give the player more context what the game is about.
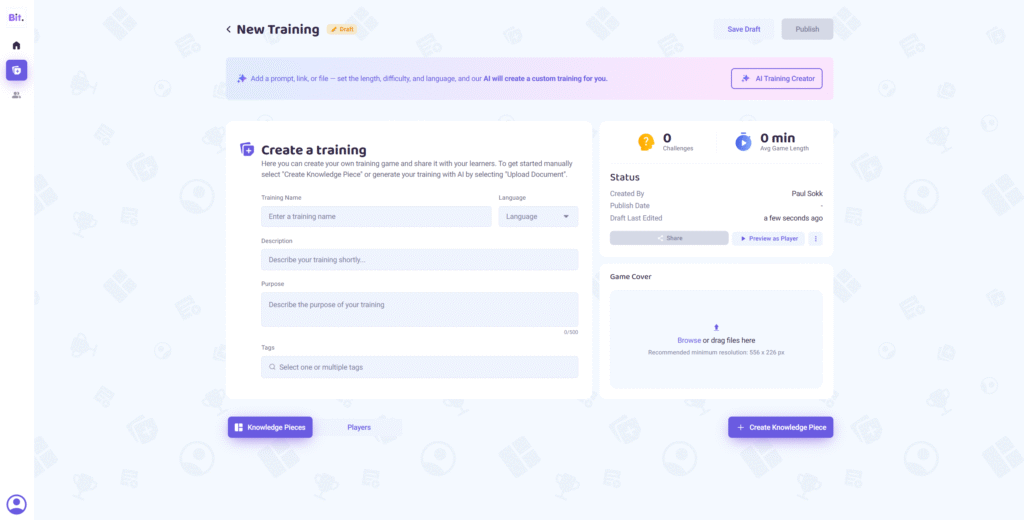
You can fill out the following:
- Name – give the game a title what it is about;
- Description – a short explanation what the game is about;
- Purpose – a short paragraph that explains what game is for and what the player will gain from this experience;
- Tags – adding tags will help you group games together, so you can later filter them by those tags;
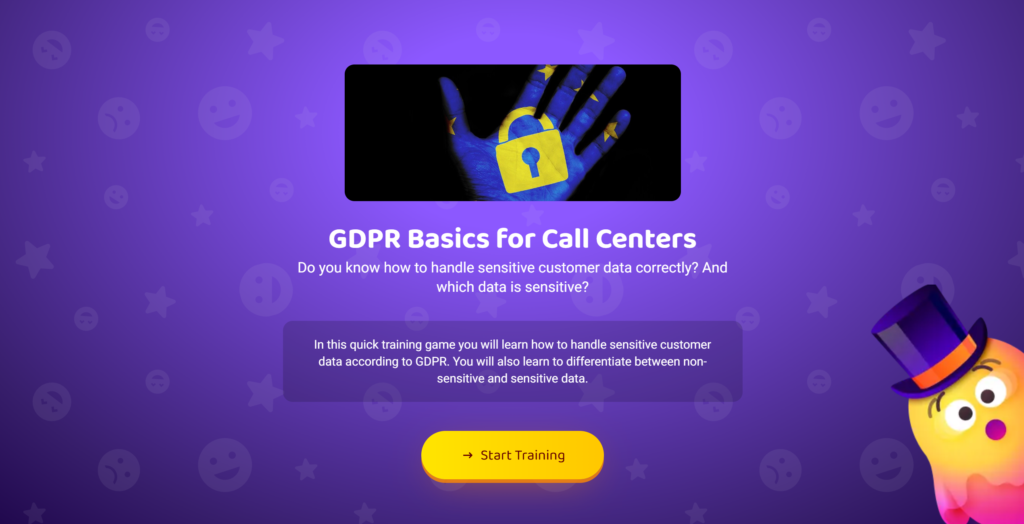
- Training Cover – a cover image which can illustrate the theme of the game for the player.
All the above information (except tags) are shown to the player at the opening screen of the game.
If you wish, you may also create a game manually by adding knowledge pieces and challenges yourself. As all challenges are grouped under knowledge pieces, you must start by pressing “+ Create Knowledge Piece”.
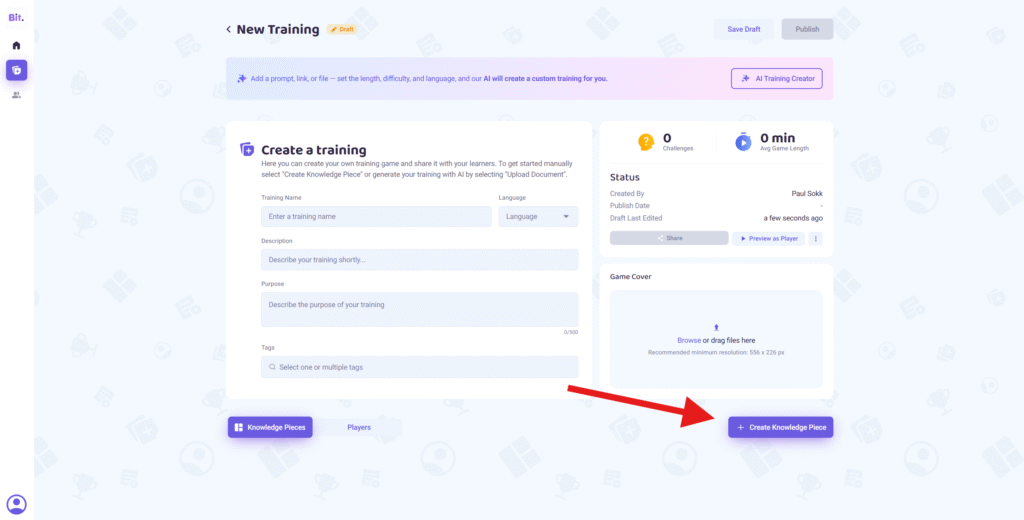
Fill the knowledge piece with the following:
- In Game Title – what this information piece could be titled;
- Knowledge info – what you want to teach your learner in this part of the game.
The challenges that are grouped under this knowledge piece are meant as a practical opportunity for the player to consolidate the knowledge info that you added here.
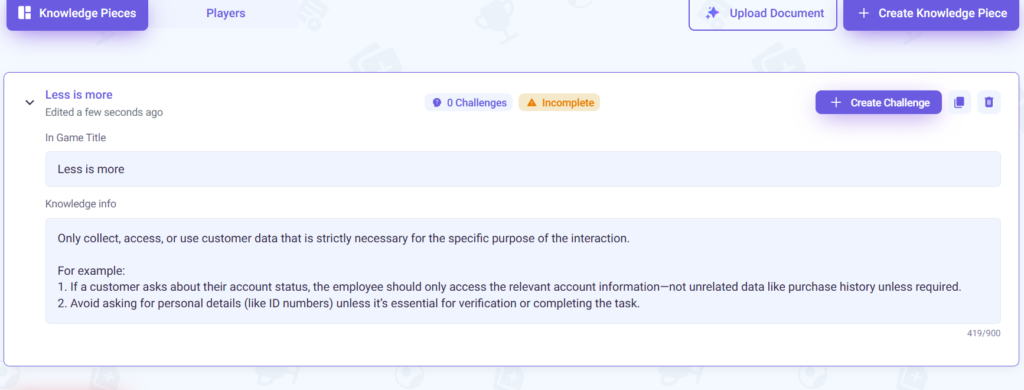
The knowledge piece will be shown to the player as a Good to Know informational screen in the game like this.
A knowledge piece is incomplete without challenges, so you’ll need to also add challenges.
All challenges belong inside Knowledge pieces. To add a new challenge, expand a knowledge piece and press “+ Create Challenge” button.
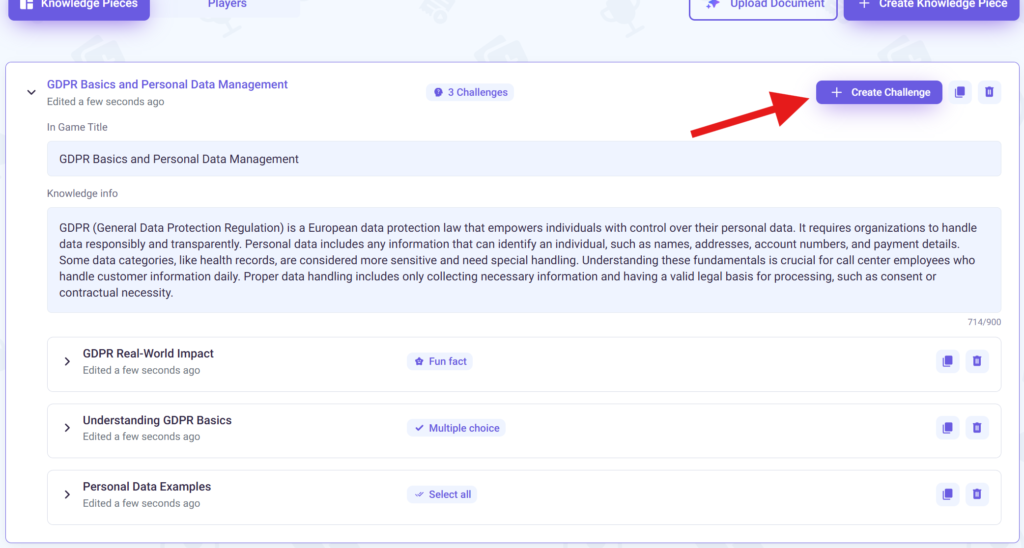
A new challenge is added and you will need to choose a challenge type. Choose the challenge type that best fits the type of exercise you want to use to consolidate the information you had in the knowledge piece.
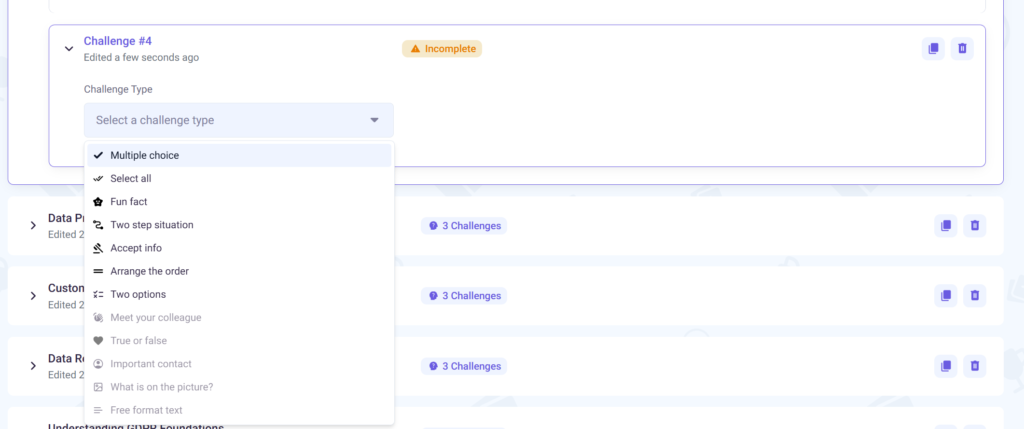
When you choose a challenge type you see the required fields for creating this challenge and a rough preview of what the challenge will look like for the player.
There are many challenge types available and each one has its unique fields. See Challenge types if you need more information about a specific challenge type.
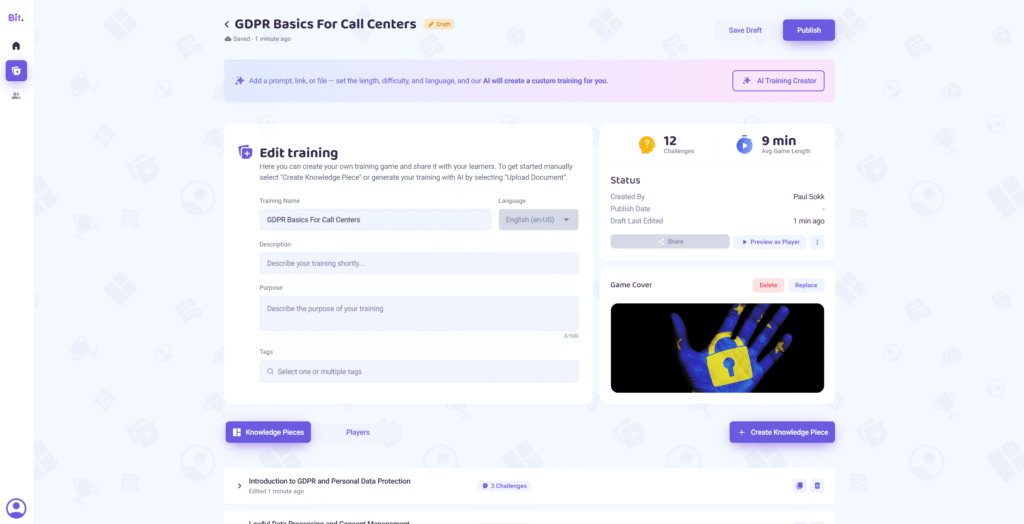
Challenges are located at the bottom of the game page. After you generate a training game with AI or manually create a game yourself, you can come back and edit the challenges manually. Just navigate to the knowledge piece or challenge you wish to edit and make the changes. Challenges are grouped under knowledge pieces, so you’ll need to expand the knowledge piece and challenge to see the contents.
Editing published games is limited! See Editing published games for more details.
⚠️ IMPORTANT: You can only freely edit and change the contents of a game while it is not published!
Once you publish a game you can only change the order of challenges in the game and the wordings/typos of texts. This limitation is needed to keep the general structure of a published training in place, so that correct statistics can be created for you afterwards.
If you wish to make larger changes to a published training, we suggest you make a duplicate of the game and make those new changes to the duplicate (as the duplicate is in the Draft state by default).
Before sharing the game with your players you may test it yourself. To do so, press the “Test game” button. Testing game does not record you as a player, so it does not use up an active player’s license, and it doesn’t record your answers under the Players tab.
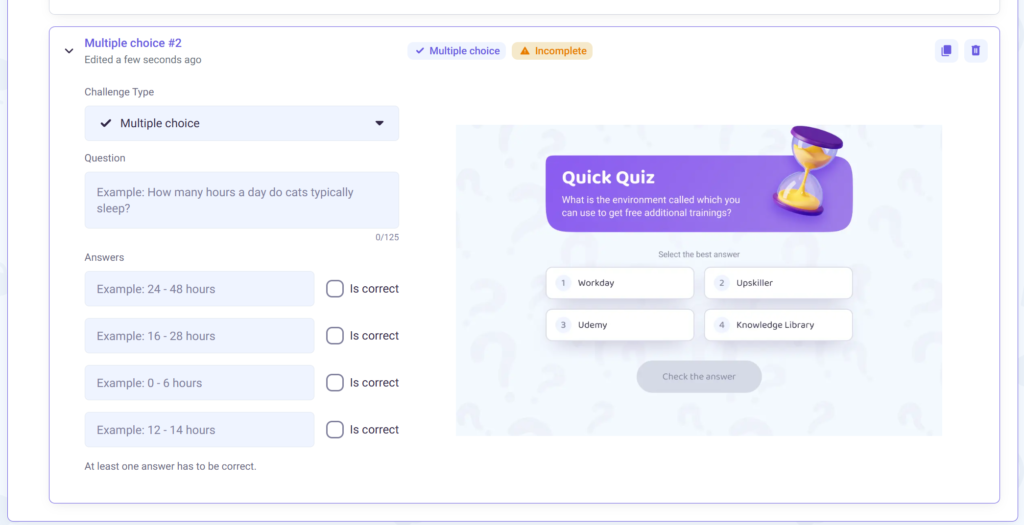
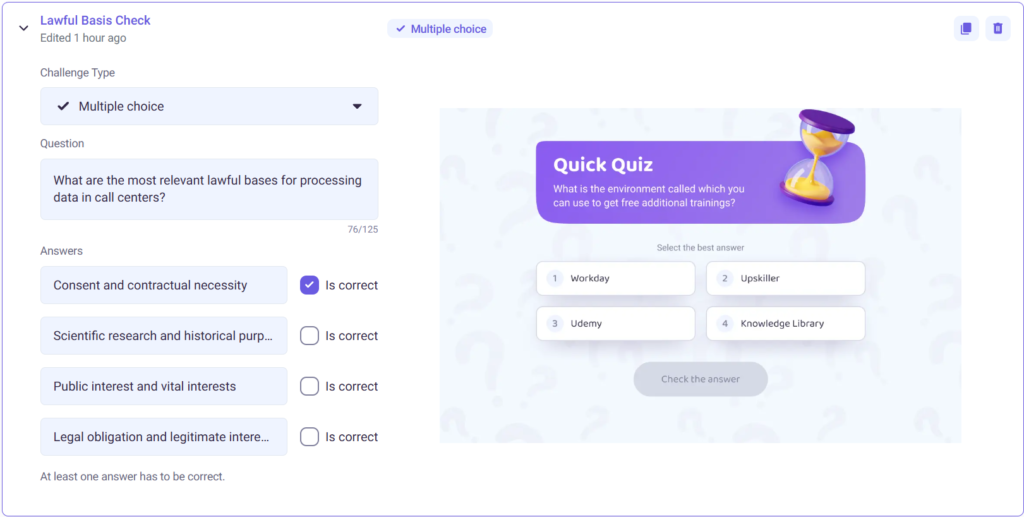
The Multiple Choice challenge type is one where the player is presented with a question and 4 possible answers. Only one of those answers is correct.
When creating this challenge you need to input the following:
- Question;
- 4 answers (and marking which is correct).
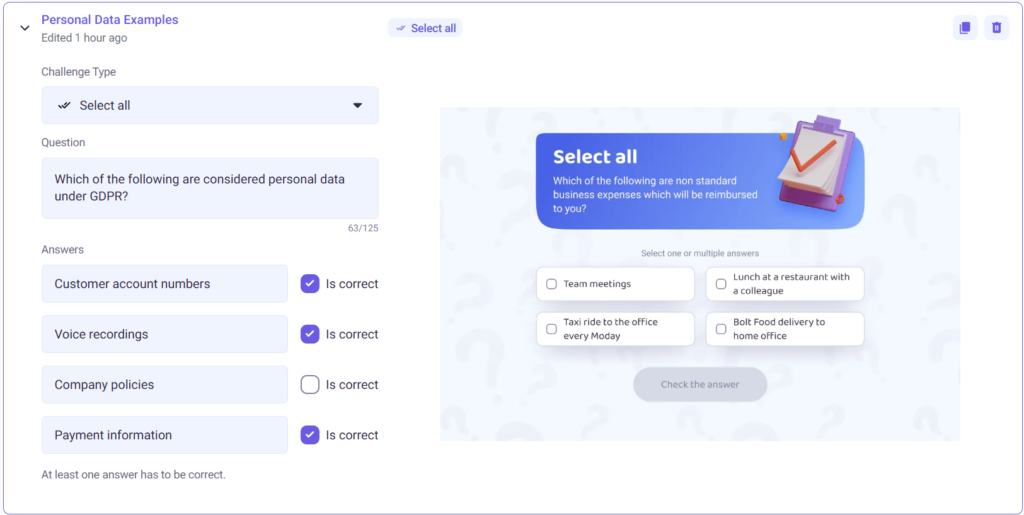
The Select All challenge type is one where the player is presented with a question and 4 possible answers. One or more answers can be correct.
When creating this challenge you need to input the following:
- Question;
- 4 answers (and marking which are correct).
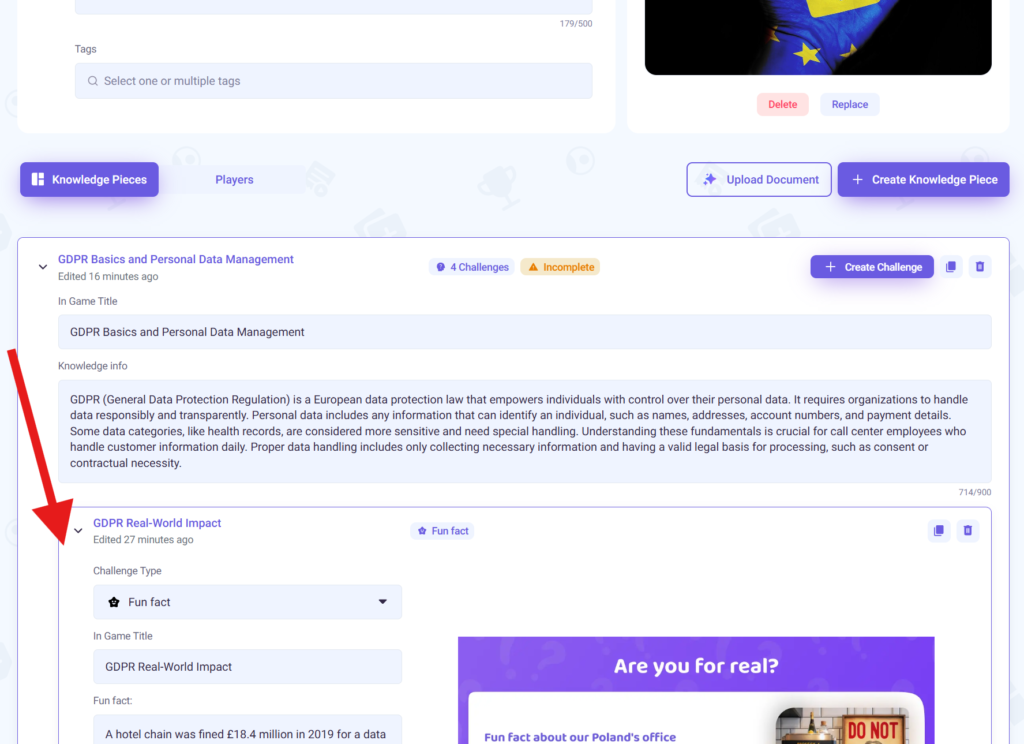
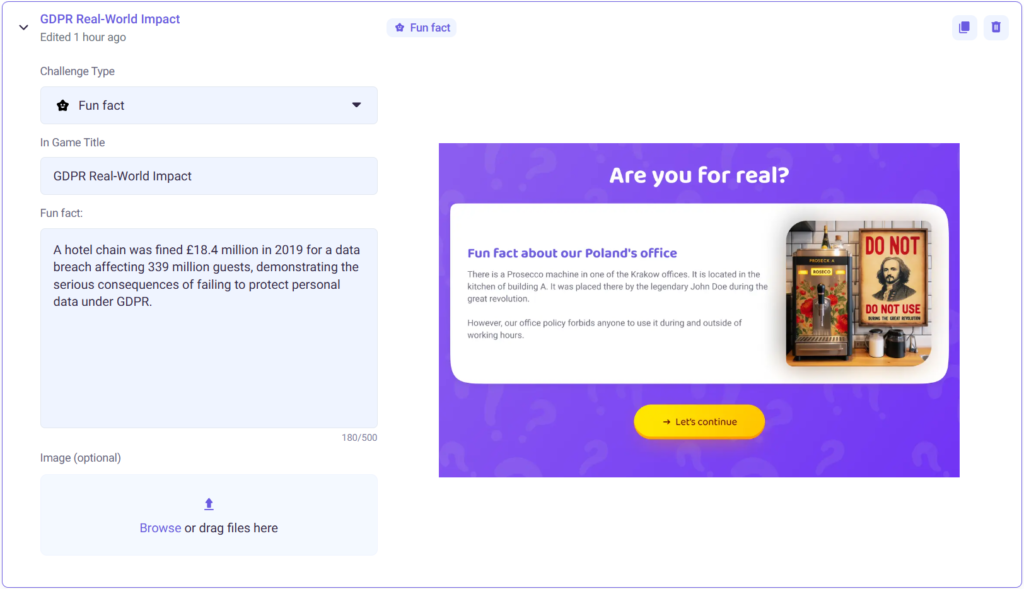
The Fun Fact challenge type is one where the player is presented with a fun fact. This is just a piece of light-hearted information. This gives you a chance to share a real-life fun story or fact that matches the topic at hand. The player can’t fail this challenge.
When creating this challenge you need to input the following:
- In Game Title;
- Fun fact – a paragraph about the fun fact you wish to share with your player;
- Image (optional) – image to illustrate the fun fact.
The Two-Step Situation challenge type is one where the player is presented with a real-life situation that they need to solve by picking the right combination of two steps from the options on the screen.
The first 4 options are possible beginnings to the solution, and after the beginning is picked, the player is shown 4 possible endings. From the total of 16 possible combinations (4×4), if the player picks the right combination, they pass the challenge.
Note: Currently this challenge type needs to be created manually and is not created with PocoBit’s AI yet. Generating this challenge type with AI is coming soon.
When creating this challenge you need to input the following:
- Situation description;
- 4 beginnings of possible solutions;
- 4 possible endings for each beginning (a total of 16 endings with at least 1 marked correct).

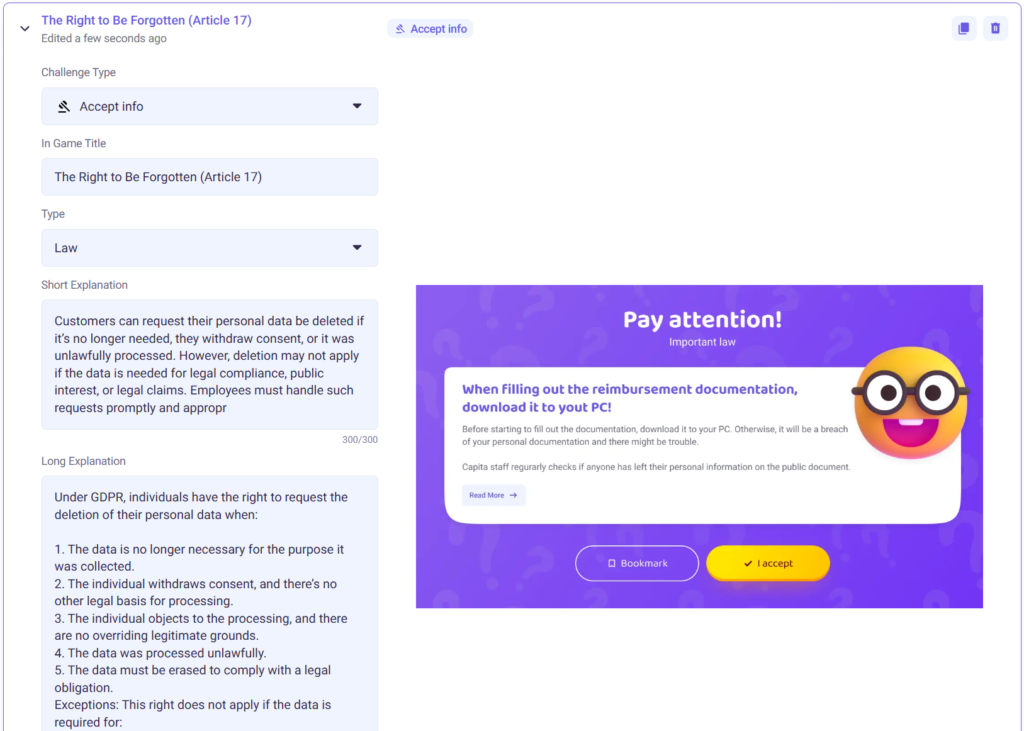
The Accept Info challenge type is one where the player is asked to accept the information on the screen in order to continue. This is a way to confirm the player’s acceptance for longer laws, rules, or other types of information which they need to confirm.
Note: Currently this challenge type needs to be created manually and is not created with PocoBit’s AI yet. Generating this challenge type with AI is coming soon.
When creating this challenge you need to input the following:
- In Game Tytle – Header text that is the name of the rule, law, or info;
- Type – choosing between law, rule, and info changes the appearance of the challenge. Laws and rules look more serious while the info looks more light-hearted.
- Short explanation – summary of the law, rule, or info the player is accepting;
- Long explanation – long format of the law, rule, or information in case the player would want to dive deeper.
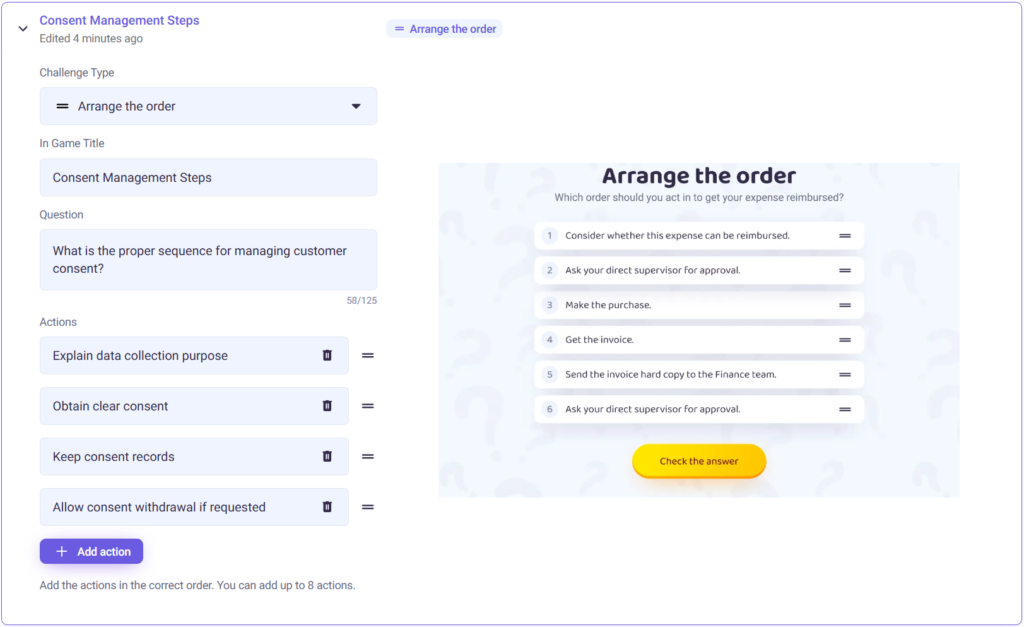
The Arrange The Order challenge type is one where the player is presented with a list of steps which they need to reorder into the correct order.
When creating this challenge you need to input the following:
- In Game Title;
- Question – explaining what the outcome of the correct order of steps should produce;
- Actions – These are the correct steps cards. The order you place these steps here is the correct combination the player also has to select. When playing, the steps will be shuffled, so the player has to guess the correct arrangement.
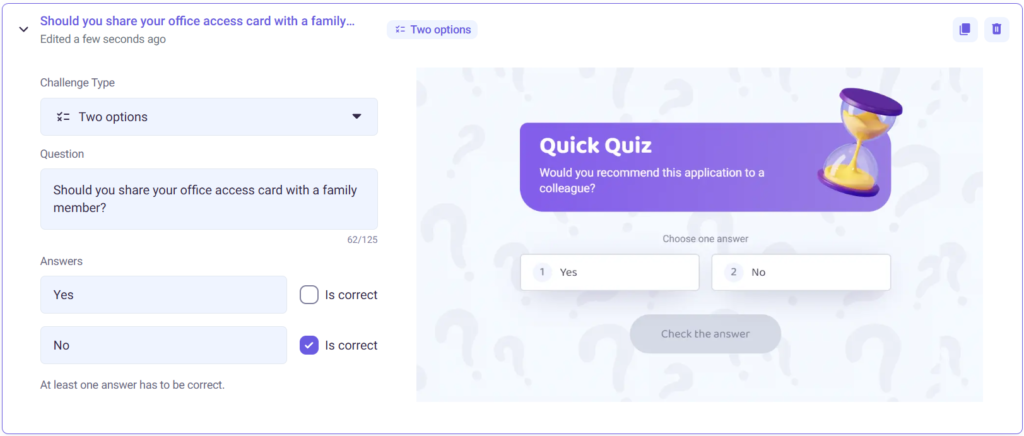
The Two Options challenge type is one where the player is presented with a question and 2 possible answers. Only one of those answers is correct.
Note: Currently this challenge type needs to be created manually and is not created with PocoBit’s AI yet. Generating this challenge type with AI is coming soon.
When creating this challenge you need to input the following:
- Question;
- 2 answers (one has to be correct).
Coming soon.
Coming soon.
Coming soon.
Coming soon.
Coming soon.
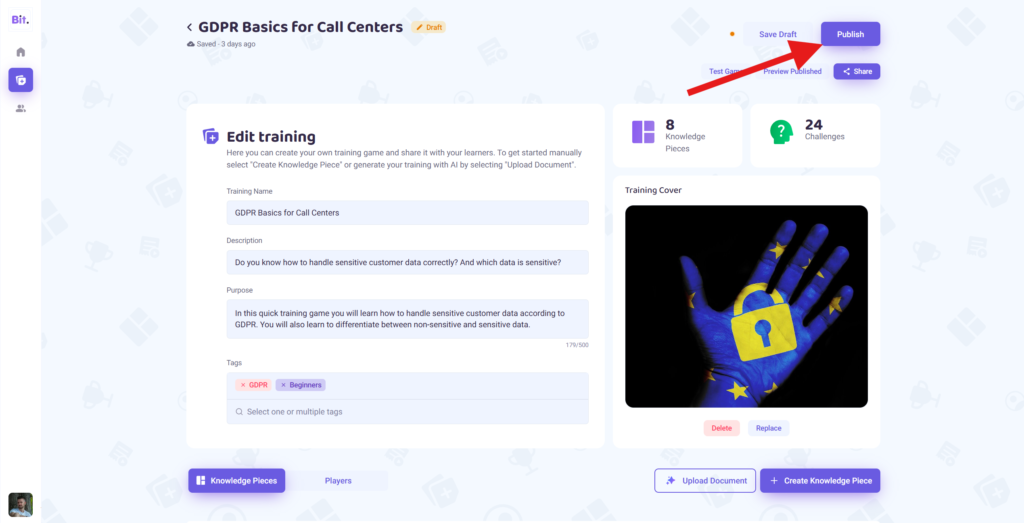
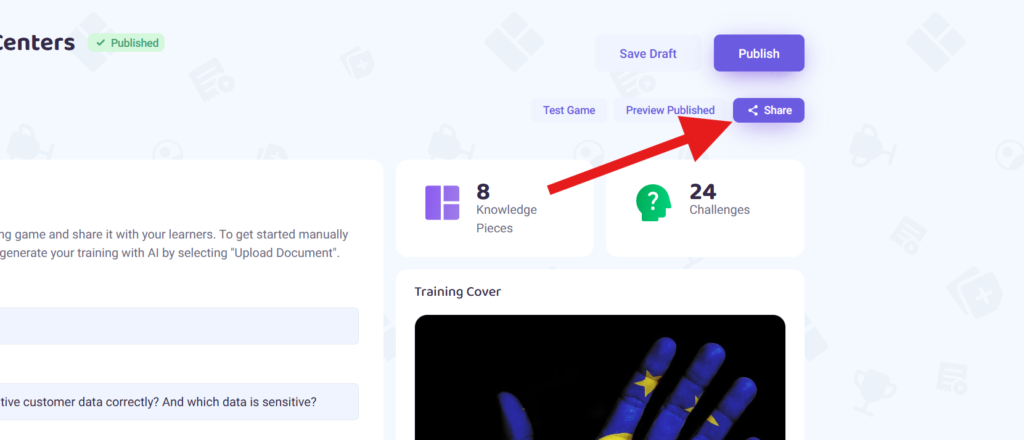
When you finish creating your game you can share it with your players by creating a shareable link. Only published games can be shared with players, so don’t forget to publish your game by clicking “Publish”!
You can create shareable links by pressing the “Share” button.
After that a shareable link creation modal opens and you can start creating your links.
- Enter a link name to remember it better later (or leave it blank);
- Select how long it will be available;
- Choose how players can access the game:
- Account required – requires all players to be logged in or create an account before starting the game. Everyone can create an account on their own with their email, Google account or Microsoft account. This way the game keeps a record of every account who played your game;
- Anonymous players – no player is required to log in and no players’ identifiers are recorded. If a player was already logged in then they still can’t be identified. Every new session is saved as a new anonymous player and players can’t return to continue where they left off later;
- Optional sign-in at the end – if a player was already signed in, then their identifier is recorded automatically. If a player wasn’t signed in, then they are given an option to do so at the end of the game, so that their identifier is recorded. If the player chooses not to sign in at the end and they weren’t signed in during the session, they show up as an anonymous player.
- Press the “+” button to create the link.
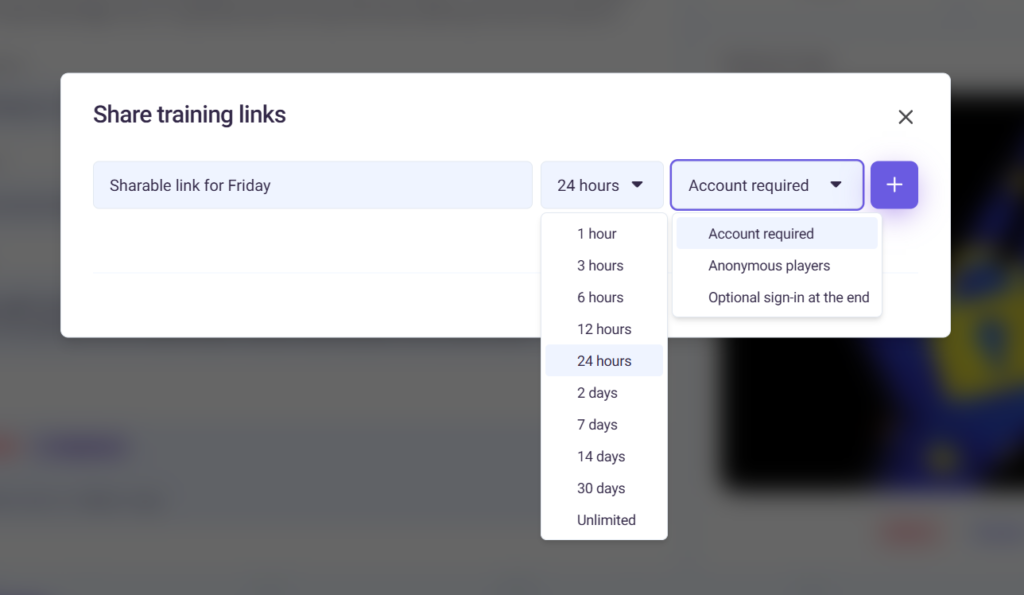
Once the link is created, the link is immediately copied to your clipboard. But you can always come back and copy it again by clicking the link in the list.

Share the created link with your players and they can access the game.
Feature coming soon.
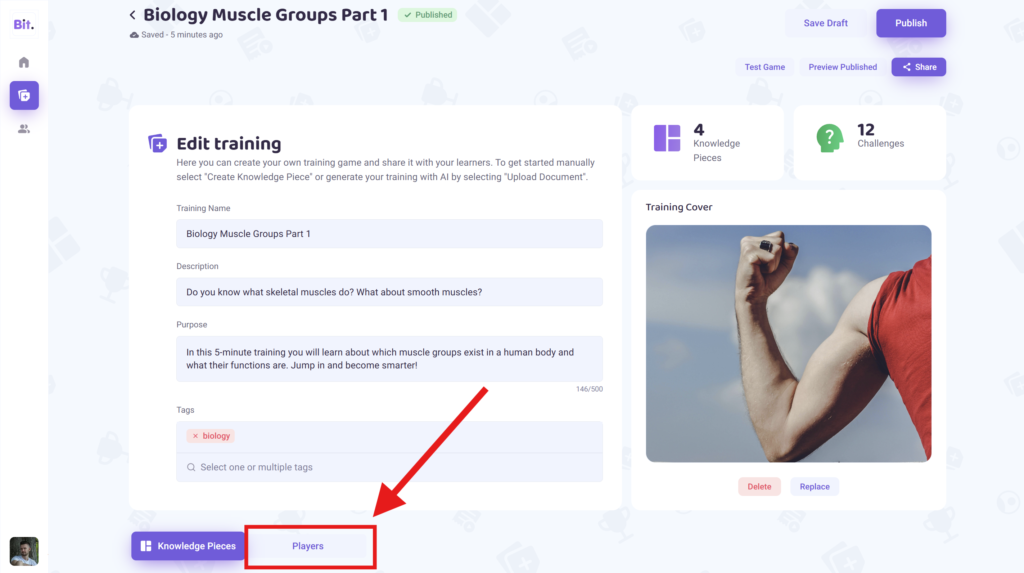
When you have published and shared your game you can start collecting players’ progress under the “Players” tab in your game managing view.
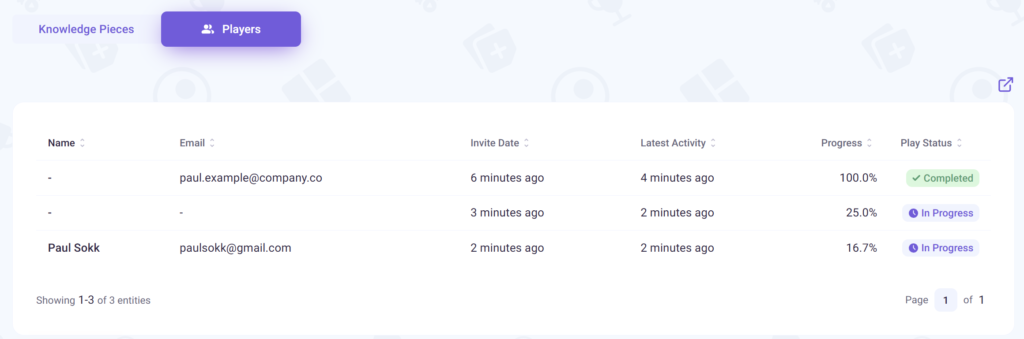
This table gives you an overview of everyone who has played your game. The columns show the following information:
- Name – name of the player if the game was played by a player who was signed up and had a full name on their profile. The name field can also be filled if the player played with an “Optional sign-in at the end” link and filled the name field there. This field may be blank if the player played with an invite link that didn’t require identification.
- Email – email address of the player. This field can be filled even when the game isn’t fully completed only if the player was signed in when playing. If the player played with an “Optional sign-in at the end” link, then they are not required to leave their email, so it may stay blank.
- Invite date – the time when the player was first invited. If the invite was in the form of a link, then the player line only appears when they start playing to avoid faulty license counting. In that case the invite date is the same time as when the player first started playing the game.
- Latest activity – last time this player was playing the game.
- Progress – how far the player is towards completing the game. Incorrectly answered challenges don’t count towards progress.
- Play status – the state of the player’s progress.
If you wish to do an in-depth analysis about the answers given by the players then it is possible to export the raw answers data in .csv format. To do so, head over to the game’s page and open the Players tab. At the top right you will see an icon for downloading the .csv file.
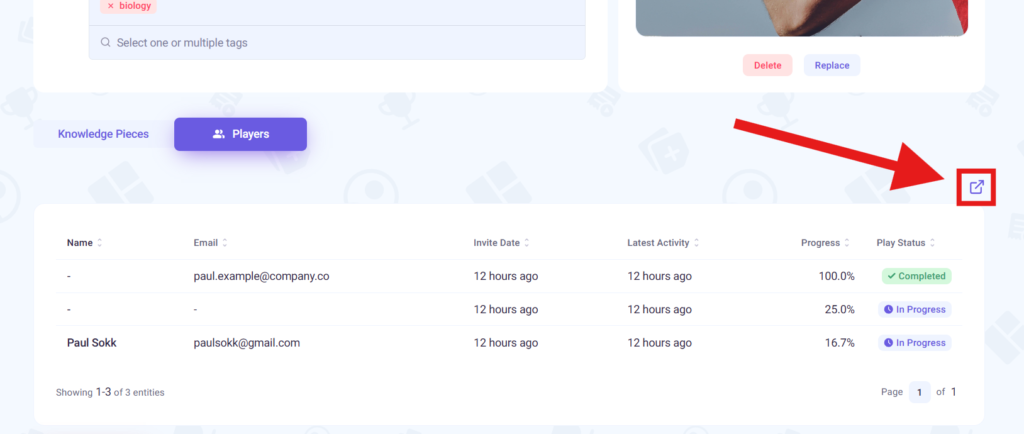
After you have downloaded the .csv file, you can import it into Excel or Google Sheets for custom analysis.
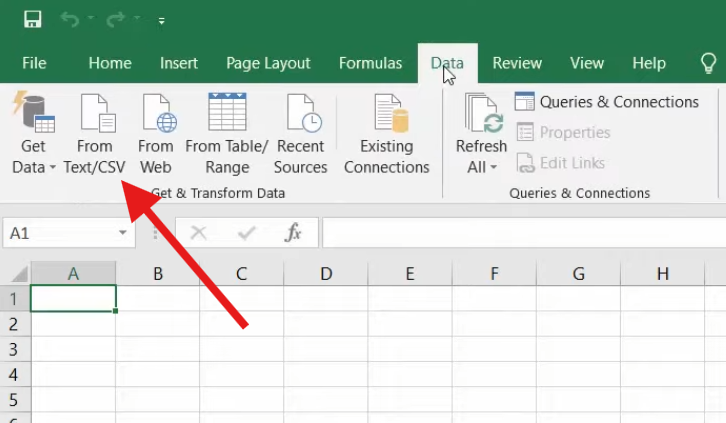
To import the raw answers .csv file into Excel open a new blank Excel file, and navigate to Data -> From Text/CSV. Then select the downloaded .csv file.
To import the raw answers .csv file into Google Sheets open a new Google Sheet file, and navigate to File -> Import. Then upload the .csv file.

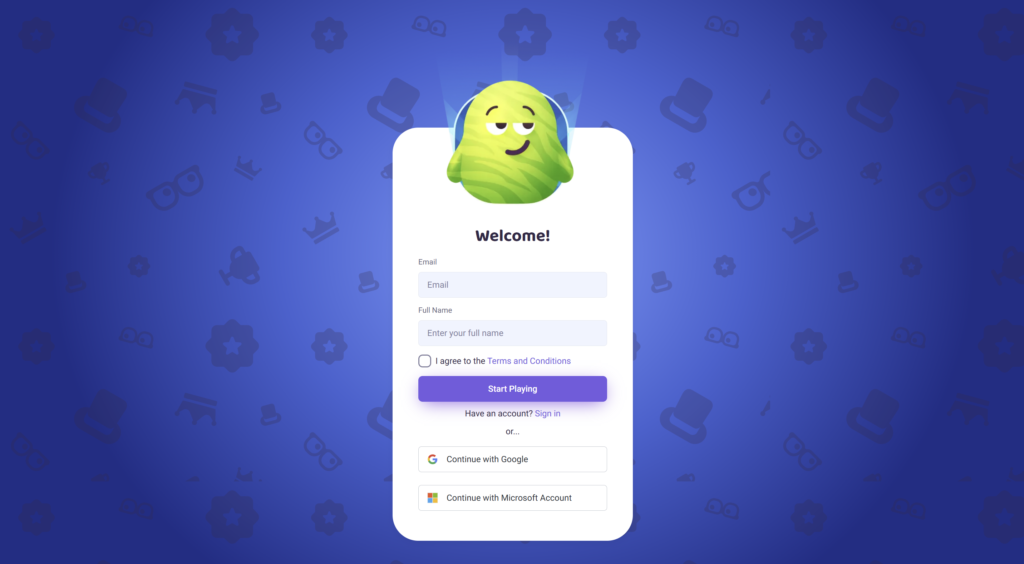
As a player, you can create an account or log in when you receive an invite link to play a game, and that invite link requires you to log in or sign up (it is “Account required” invite link). In that case, you are presented with the following screen.

If you don’t already have an account you have 3 options:
- Create an account with your email by filling the Email field, filling the Full Name field, agreeing to terms and conditions, and pressing “Start Playing”;
- Create an account with your Google Account by pressing “Continue with Google”;
- Create an account with your Microsoft account by pressing “Continue with Microsoft”.
If you choose to sign up with an email, you are asked to confirm your email before you can start playing the game.

Just find the email titled “Welcome to PocoBit” in your inbox and press the “Login” button in the email.
PocoBit has a passwordless sign-up and sign-in process for players, so we don’t ask you for a password.
If you signed up with an email that is also a Google or Microsoft account, then you may also log in with the Google / Microsoft button in the future, and the account is the same.
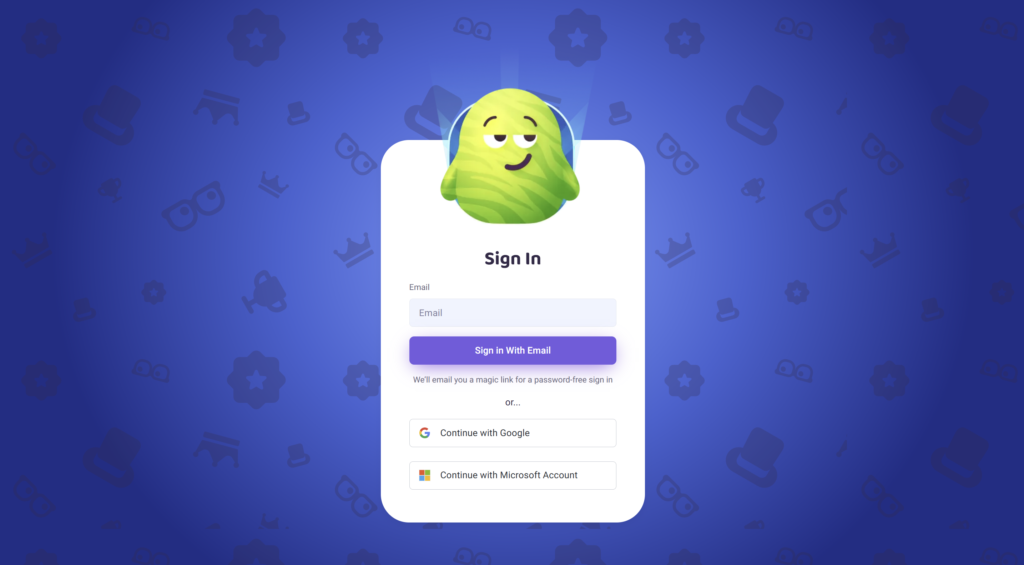
If you have previously signed up as a player then you can simply sign in to start playing. You have multiple options to do so:
- Press the “Sign in” link to sign in with an email;
- Press the “Continue with Google” to sign in with a Google account;
- Press the “Continue with Microsoft” to sign in with a Microsoft account;
If you pressed the “Sign in” link, then you are asked for your email address. That way we can send you a sign-in link. We don’t ask you for a password for a more secure login.
To receive a creator’s account you must sign up to a tier of your choice at the pricing page.
You have 5 options in total:
Choose one of the above links to get started. You may switch between tiers at any time. When you sign up to one of the tiers you will receive access to the platform within 1 business day, usually no later than 1 hour after signup.
When you receive access to PocoBit you will receive an email with the title “Welcome to PocoBit”. Follow the link in the email to complete signup and start using PocoBit.
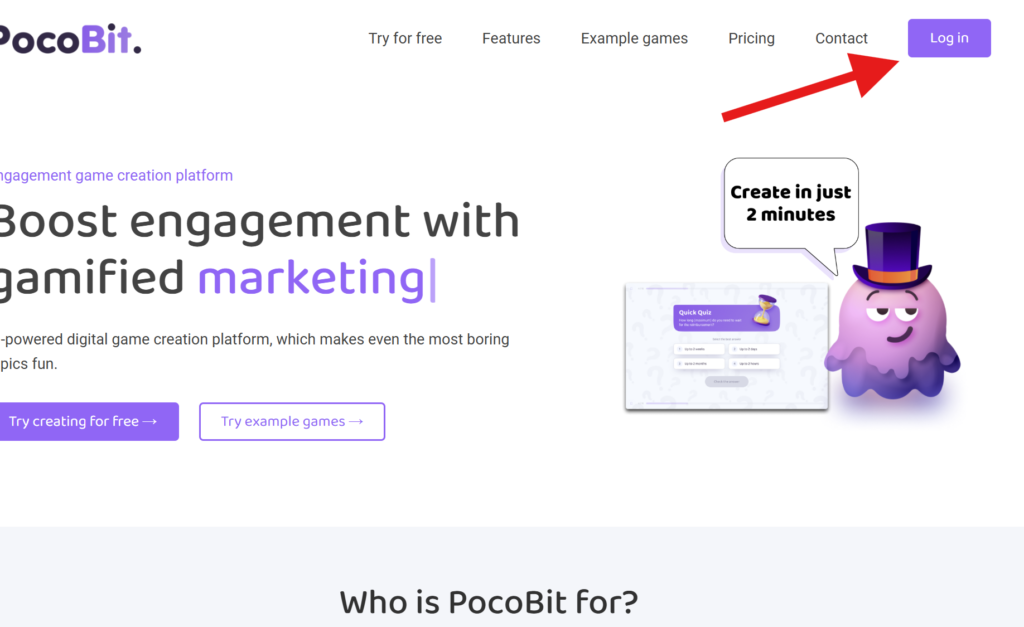
To log in as a creator head over to app.pocobit.io/login or press the “Log in” button in the menu of PocoBit’s website.
You will find yourself in the login page where you have the following options:
- Log in without password – You don’t have to remember your password. You can just enter your email, and a logging in link will be sent to your email;
- Logging in with password – Regular logging in with password;
- Continuing with Google;
- Continuing with Microsoft.
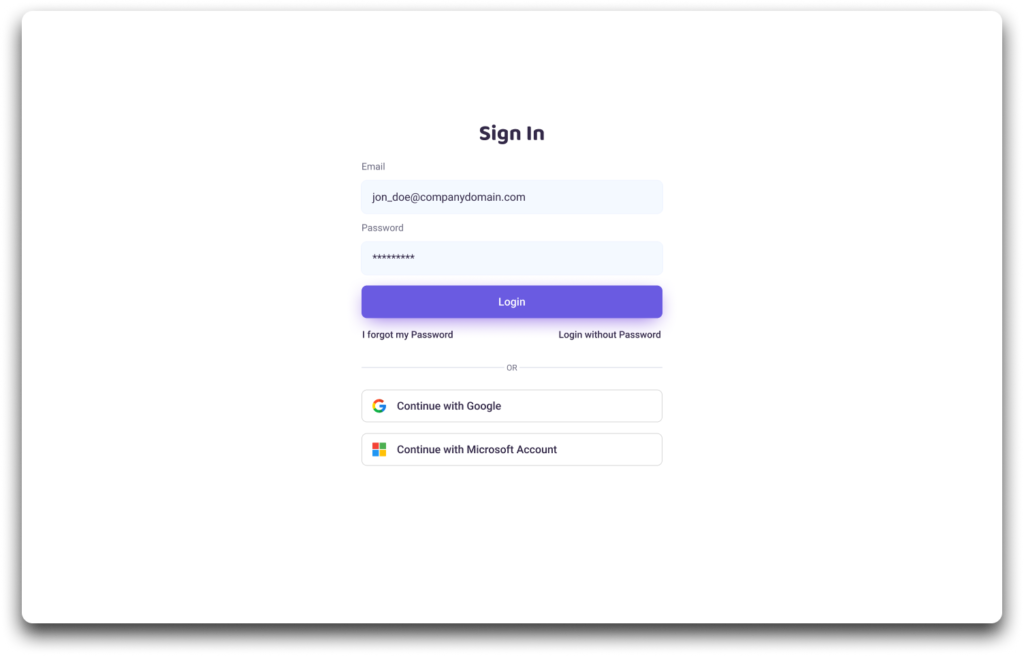
If the email you signed up with can also be used as a Google or Microsoft account, then you may also log in with the Google or Microsoft button.
If you wish to log out of your creator account, then you can do so in the left-side navigation menu with the button “Log out”.
To sign up for a free trial just head over to Sign up for a free trial page and fill out the form.
You will receive access usually in less than an hour.